Đối với hầu hết mọi người sẽ một có khoảng thời gian làn da luôn ở trong trạng thái tốt nhất nhưng sau đó lại phát hiện các đốm mụn đỏ bắt đầu nổi lên trên da! Các đốm mụn đỏ có thể khó che đi nếu chỉ sử dụng kem nền thông thường, tuy nhiên khi bạn kết hợp sử dụng đúng loại kem che khuyết điểm và làm theo các bước dưới đây, sẽ giúp làm giảm hoặc thậm chí che đi hoàn toàn các vết mụn đỏ.
Trình tự 1: Chọn đúng kem che khuyết điểm
Bước 1: Chọn kem che khuyết điểm có tone màu xanh lá cây
Khi chọn kem che khuyết điểm, hãy chọn những loại có tone màu xanh lá cây; màu xanh lá cây đối lập với màu đỏ, đó là lý do tại sao kem che khuyết điểm màu xanh lá cây có tác dụng làm mờ và trung hòa các đốm đỏ. Chấm kem che khuyết điểm lên vùng da bạn muốn trung hòa để hiệu chỉnh màu sắc lại và tán các cạnh của lớp kem để tạo được lớp che phủ đồng đều.
Đảm bảo lấy ít sản phẩm để tạo từng lớp mỏng trên da cho đến khi các khuyết điểm được che phủ hoàn toàn. Sẽ khó khăn hơn nếu sử dụng một lượng lớn kem che khuyết điểm màu xanh lá cây để tạo một lớp che phủ dày trên các vết mụn đỏ.
Sau khi đã dùng kem che khuyết điểm, hãy bắt đầu đánh kem nền thường dùng lên da. Hoặc thao tác ngược lại, đánh lớp kem nền trước rồi đến kem che khuyết điểm (xem phần tiếp theo để biết được đầy đủ các bước thực hiện).

Bước 2: Mua kem che khuyết điểm được dùng riêng cho các vết mụn đỏ
Những loại kem che khuyết điểm này sẽ giúp che đi các đốm đỏ từ tình trạng mụn trứng cá bị kích ứng hoặc sẹo hoặc thậm chí các bệnh về da, chẳng hạn như bệnh trứng cá đỏ (rosacea). Chấm kem che khuyết điểm trực tiếp lên các vùng da bị mẩn đỏ và tán đều với nhau để tạo lớp che phủ đồng đều.

Bước 3: Sử dụng sản phẩm hiệu chỉnh màu sắc da
Sử dụng sản phẩm hiệu chỉnh màu sắc da bên dưới lớp kem nền để có thể che đi các đốm mụn đỏ và các vết thâm khác do tình trạng tăng sắc tố trên da. Kỹ thuật này sẽ làm sáng các vùng da sẫm màu và giúp cải thiện đáng kể làn da không đều màu của bạn. Nhẹ nhàng, chấm sản phẩm hiệu chỉnh màu sắc lên các vùng da bị đổi màu.

Bước 4: Sử dụng kem che khuyết điểm phân khúc cao cấp (sản phẩm high-end)
Các sản phẩm rẻ tiền hiếm khi giúp che phủ tốt các vùng da có các đốm mụn đỏ lớn. Các loại kem che khuyết điểm này thường có kết cấu khá lỏng và mỏng khó có thể tạo được lớp che phủ hoàn toàn, mặc dù các loại này có thể che đi những khuyết điểm nhỏ nhưng lại khó có thể che đi được các đốm mụn sậm màu hơn.
Các loại kem che khuyết điểm trong phân khúc cao cấp, chẳng hạn như Dermablend Cover Creme True Beige, có kết cấu đặc hơn và được ứng dụng để che phủ tốt các đốm thâm mụn sẫm màu hơn, đồng thời có thể đóng vai trò vừa là kem che khuyết điểm và vừa là kem nền.
Lấy một lượng nhỏ sản phẩm và xoa giữa các đầu ngón tay để làm mềm. Chấm và tán trực tiếp trên các vùng da có khuyết điểm. Để nó khô đi trước khi áp dụng thêm các lớp kem che khuyết điểm bổ sung nếu cần. Luôn sử dụng phấn phủ định hình lại lớp kem nền.

Bước 5: Sử dụng các sản phẩm độ che phủ tốt hơn
Các đốm mụn hoặc các tổn thương do mụn trứng cá lớn hơn đòi hỏi bạn phải thực hiện nhiều thao tác che phủ tốt hơn. Một loại kem che khuyết điểm có độ che phủ tốt hơn sẽ giúp che đi được nhiều khuyết điểm khác nhau, chẳng hạn như các vết thâm, nốt ruồi và vết bớt.

Trình tự 2: Cách makeup để che đi các đốm mụn đỏ
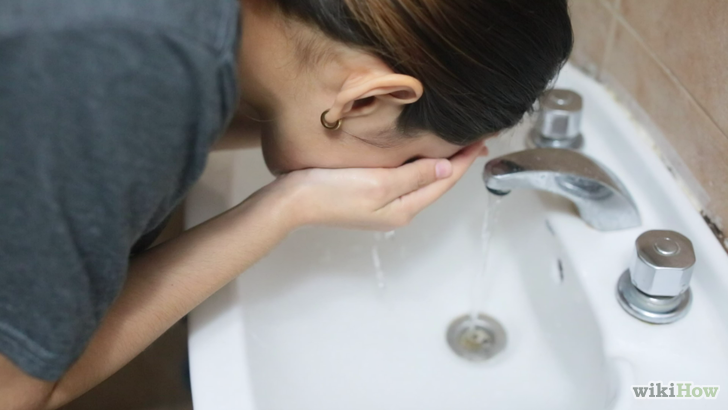
Bước 1: Rửa sạch da mặt
Đảm bảo da mặt tươi tắn sạch sẽ trước khi tạo lớp makeup mới trên da. Sử dụng nước ấm và sửa rửa mặt để loại bỏ bụi bẩn, dầu và các chất cặn không mong muốn khác. Làm ướt mặt bằng nước ấm và xoa xà phòng rửa măt hoặc sữa rửa mặt trên tay. Xoa nhẹ đều lên mặt để loại bỏ hoàn toàn bụi bẩn và rửa mặt sạch lại. Luôn thấm khô da trước khi dùng bất kỳ sản phẩm nào lên da.
Bước 2: Sử dụng kem dưỡng ẩm hàng ngày
Các loại kem dưỡng ẩm hàng ngày dành cho da mụn có khả năng kiểm soát dầu sẽ giúp hạn chế tình trạng kích ứng mụn trên da bằng cách loại bỏ dầu thừa và làm dịu da. Thoa kem dưỡng ẩm lên da mặt, đảm bảo tất cả các vùng da mặt đều đã được thoa kĩ. Để khô trước khi tiếp tục bước tiếp theo.

Bước 3: Đánh kem nền
Kem nền được sử dụng để tạo một lớp nền tổng thể đồng đều trên da giúp che phủ những vùng da không đều màu, những nốt mẩn đỏ hoặc những vết mụn. Bạn có thể đánh kem che khuyết điểm trước khi đánh kem nền, tuy nhiên việc đánh lớp kem nền trước giúp bạn dễ dàng xác định các vùng da chưa được che phủ tốt và cần sử dụng kem che khuyết điểm để che phủ lại tốt hơn
Sử dụng kem lót để làm mịn da trước để lớp kem nền được đánh sau đó mướt hơn, bám vào da tốt hơn và không đọng lại thành các vệt, mảng khô hoặc tạo lớp sần sùi trên da. Để lớp kem lót khô trước khi đánh kem nền.
Lấy một lượng kem nền cỡ một đồng xu ra mu bàn tay và dùng ngón tay sạch chấm đều các vùng trán, mũi và cằm. Dặm đều và mịn sản phẩm trên da, dặm đều để tán từ giữa ra phía ngoài. Tán dọc theo quai hàm để không bị lộ rõ trên da.

Bước 4: Đánh kem che khuyết điểm
Sử dụng kem che khuyết điểm trong phân khúc cao cấp để có thể đạt được kết quả che phủ tốt nhất. Các loại kem che khuyết điểm được xem là tốt nhất sẽ có khả năng trung hòa để hiệu chỉnh lại các vùng da bị đổi màu, có màu sắc sáng hơn, che phủ tốt các vết thâm do tình trạng tăng sắc tố và kết hợp tốt với lớp kem nền để tạo được lớp makeup đều màu trên da.
Chấm kem che khuyết điểm lên vùng da bị đổi màu bằng ngón tay, cọ hoặc bông mút trang điểm sạch. Dặm nhẹ để tán cho đến khi các mép hòa trộn đều và mịn vào lớp kem nền và không còn đọng lại các vệt trên da.
Lưu ý: không sử dụng các sản phẩm che khuyết điểm dạng lỏng hoặc kem để đánh lên trên lớp kem nền dạng phấn (phấn nền). Nếu bạn sử dụng phấn nền, hãy sử dụng kem che khuyết điểm trước và để khô trước khi đánh lớp phấn nền lên trên.

Bước 5: Dùng phấn phủ để định hình lớp makeup
Sử dụng phấn phủ định hình để hoàn thiện lại lớp makeup. Điều này sẽ giúp giữ lớp kem nền và kem che khuyết điểm của bạn lâu trôi hơn. Dùng cọ mềm (fluffy brush) để phủ một lớp phấn phủ lên những vùng da dễ bị bóng dầu.
Gõ nhẹ cọ để loại bỏ đi các bột phấn thừa và phủ nhẹ lên da để đảm bảo không tạo lớp phấn dày trên da. Lưu ý: có sự khác biệt giữa phấn phủ dạng bột và dạng nén. Phấn phủ dạng bột sẽ giúp lớp makeup trông tự nhiên hơn tự nhiên hơn nhưng các bột phấn sẽ dễ rơi vương vãi trên da hơn.

Bước 6: Thu hút sự chú ý vào mắt và môi của bạn
Makeup mắt và môi thật nổi bật để tạo điểm nhấn thu hút trên khuôn mặt và giúp bớt gây sự chú ý hơn vào các đốm mụn đỏ. Sử dụng các sản phẩm makeup mắt hoặc son môi có màu đậm hơn để thu hút sự chú ý.

Trình tự 3: Điều trị các đốm mụn đỏ
Bước 1: Chỉ sử dụng sản phẩm làm sạch dịu nhẹ, có công thức an toàn
Bạn có thể thử các sản phẩm chứa các dạng hạt scrub nhỏ để tẩy tế bào chết vật lý cho da và giúp loại bỏ các vùng da bị đổi màu, nhưng sẽ rất dễ làm tổn thương da, khiến da bạn khó lành. Thay vào đó, hãy sử dụng các sản phẩm làm sạch dịu nhẹ cho da mặt như sữa rửa mặt dạng gel dòng HydraLight (dòng sản phẩm dưỡng ẩm và làm sáng da).
Thoa một lượng nhỏ gel rửa mặt lên mặt và vùng mắt còn hơi ướt. Sử dụng chuyển động tròn nhẹ nhàng để loại bỏ sạch các vết bẩn và dầu nhờn trên da. Rửa sạch lại với nước. Để loại bỏ lớp makeup đậm, hãy lặp lại hoặc sử dụng với khăn sạch và ướt.

Bước 2: Tẩy tế bào chết hóa học bằng AHA hoặc BHA
AHA (axit alpha hydroxy) có trong các loại trái cây, quả hạch, sữa hoặc đường. Chúng phá vỡ liên kết giữa các tế bào, giúp tẩy tế bào chết trên da dễ dàng hơn. BHA hay axit salicylic được tìm thấy trong vỏ cây liễu (willow tree bark), tinh dầu lộc đề xanh (wintergreen oil), hoặc tinh dầu bạch dương ngọt (sweet birch). Axit salicylic có thể ngấm vào dầu trong da và loại bỏ các tế bào da chết và cặn bã dư thừa trong nang lông.
Đây cũng là một chất chống viêm tốt có khả năng làm giảm mẩn đỏ hiệu quả. Lấy một lượng vừa đủ thoa lên toàn bộ khuôn mặt nhưng tránh tiếp xúc trực tiếp với vùng da mắt và môi. Để trên da, không rửa sạch. Sử dụng một hoặc hai lần mỗi ngày sau khi làm sạch da và dùng toner. Đảm bảo thoa kem chống nắng có chỉ số SPF 25 trở lên vào ban ngày.

Bước 3: Sử dụng kem chống nắng hoặc kem dưỡng ẩm có chứa SPF 25+ trở lên mỗi ngày
Da tiếp xúc trực tiếp với với tia UV mà chưa được bảo vệ tốt sẽ gây tổn thương và ngăn chặn khả năng chữa lành của da. Đồng nghĩa với việc các vết thâm mụn đỏ có thể tồn tại lâu hơn hoặc thậm chí trầm trọng hơn. Tiếp xúc với tia cực tím làm tổn thương các tế bào da, và làm chậm quá trình chữa lành mụn trên da.
Bảo vệ làn da khỏi tiếp xúc với tia cực tím hàng ngày là rất quan trọng để làm mờ các đốm mụn đỏ. Sử dụng kem chống nắng như bước cuối cùng trong quy trình chăm sóc da buổi sáng của bạn. Thoa lại ít nhất 2 giờ một lần nếu da tiếp xúc nhiều với ánh nắng mặt trời.

Bước 4: Sử dụng các sản phẩm chống oxy hóa có chứa Vitamin C và Retinol
Hai thành phần chống oxy hóa này giúp bảo vệ da khỏi các tổn thương thêm, đồng thời đẩy nhanh quá trình chữa lành các tế bào da bị tổn thương. Những chất này giúp giảm viêm và giúp các vết đổi màu có thời gian chữa lành ngắn hơn.
Sử dụng toner, serum và / hoặc kem dưỡng ẩm có có chứa các thành phần này trong công thức. Áp dụng sau khi làm sạch da, thoa toner và tẩy tế bào chết hóa học. Tránh sử dụng xung quanh vùng da mắt và môi. Có thể được áp dụng cùng lúc với các sản phẩm AHA hoặc BHA.
Một số người có thể bị kích ứng với retinol chậm sau một thời gian sử dụng. Vì vậy đừng chủ quan nếu không thấy kích ứng chỉ sau một vài lần bôi và vội quyết định áp dụng một cách thương xuyên hơn. Hãy chú ý quan sát các phản ứng trên da và điều chỉnh, sử dụng cho phù hợp.
Nếu xảy ra hiện tượng nhạy cảm xảy ra (mẩn đỏ, bong tróc da, đau rát hoặc khô da), hãy giảm tần suất sử dụng hoặc trộn một lượng retinol đủ dùng cho một lần điều trị với serum hoặc kem dưỡng ẩm ban đêm yêu thích của bạn.

Bước 5: Sử dụng chất làm sáng da
Bạn cũng nên sử dụng các chất làm sáng da, chẳng hạn như bột nghệ, bột cam thảo hoặc nước cốt chanh, để giảm sự xuất hiện của các đốm mụn đỏ. Tuy nhiên, các phương pháp điều trị tại nhà này rất ít các bằng chứng khoa học chứng minh tính hiệu quả của chúng.
Củ nghệ có chứa một chất gọi là curcumin làm giảm tốc độ sản xuất melanin trên da. Trộn hỗn hợp bột nghệ với nước cốt chanh vàng và nước ép dưa chuột rồi thoa lên da. Để trong 15 phút và rửa sạch da lại. Trộn một lượng nhỏ bột chiết xuất cam thảo trong nước cất, chiết xuất cảm thảo chứa một hợp chất gọi là Glabridin có tác dụng làm sáng da.
Nhúng một miếng khăn mỏng sạch vào hỗn hợp và đắp lên các nốt mụn đỏ. Dùng bông gòn chấm nước cốt chanh vàng tươi lên da. Bạn cũng có thể trộn hỗn hợp nước cốt chanh vàng, nước cốt chanh xanh và nước bưởi để bôi lên da.

Bước 6: Cân nhắc điều trị y tế
Nghiên cứu cho thấy rằng các vết mụn thâm đỏ và nâu đen có thể được loại bỏ hiệu quả bằng một loạt các phương pháp điều trị bằng ánh sáng xung cường độ cao (IPL). Phương pháp này sẽ được thực hiện bởi các bác sĩ da liễu.
Một lựa chọn khác là thay da sinh học hay tẩy da da hóa học bằng BHA hoặc AHA hàng tháng do bác sĩ da liễu thực hiện. Cuối cùng, phương pháp mài da vi điểm (microdermabrasion) là một lựa chọn khác do bác sĩ da liễu thực hiện.

Bước 7: Hãy hỏi ý kiến bác sĩ xem bạn có nên sử dụng thuốc kê đơn theo toa hay không
Bác sĩ da liễu có thể đề nghị bạn sử dụng một loại thuốc kê đơn để điều trị, chẳng hạn như một loại thuốc có chứa axit azelaic ức chế tổng hợp melanin và giúp giảm chứng tăng sắc tố trên da. Luôn sử dụng thuốc kê đơn theo nhãn sản phẩm. Nếu bị kích ứng, hãy ngừng sử dụng sản phẩm và hỏi ý kiến bác sĩ.

Tác giả: Margareth Pierre-Louis. Biên dịch: Huyền Trân.
Nguồn: Wikihow. Bản quyền thuộc về: Kallos Vietnam.
Đôi nét về tác giả Margareth Pierre-Louis, MD
Bài viết này được đồng tác giả bởi Margareth Pierre-Louis, MD. Dr. Margareth Pierre-Louis là bác sĩ da liễu đã được cấp phép, và là một doanh nhân, người sáng lập Twin Cities Dermatology Center và Equation Skin Care ở Minneapolis, Minnesota. Twin Cities Dermatology Center là một phòng khám da liễu toàn diện điều trị bệnh nhân ở mọi lứa tuổi thông qua da liễu lâm sàng, da liễu thẩm mỹ và y học từ xa.
Equation Skin Care được tạo ra để cung cấp các sản phẩm chăm sóc da tự nhiên, dựa trên bằng chứng khoa học tốt nhất. Dr. Pierre-Louis lấy bằng cử nhân sinh học và bằng thạc sĩ quản trị kinh doanh tại Đại học Duke, bằng tiến sĩ y khoa từ Đại học North Carolina ở Chapel Hill, đã hoàn thành nội trú về da liễu tại Đại học Minnesota, và hoàn thành nghiên cứu sinh da liễu tại Đại học Washington ở St Louis. Dr. Pierre-Louis được chứng nhận điều trị về da liễu, phẫu thuật da và bệnh da liễu bởi Hiệp hội da liễu và bệnh lý học Hoa Kì.